
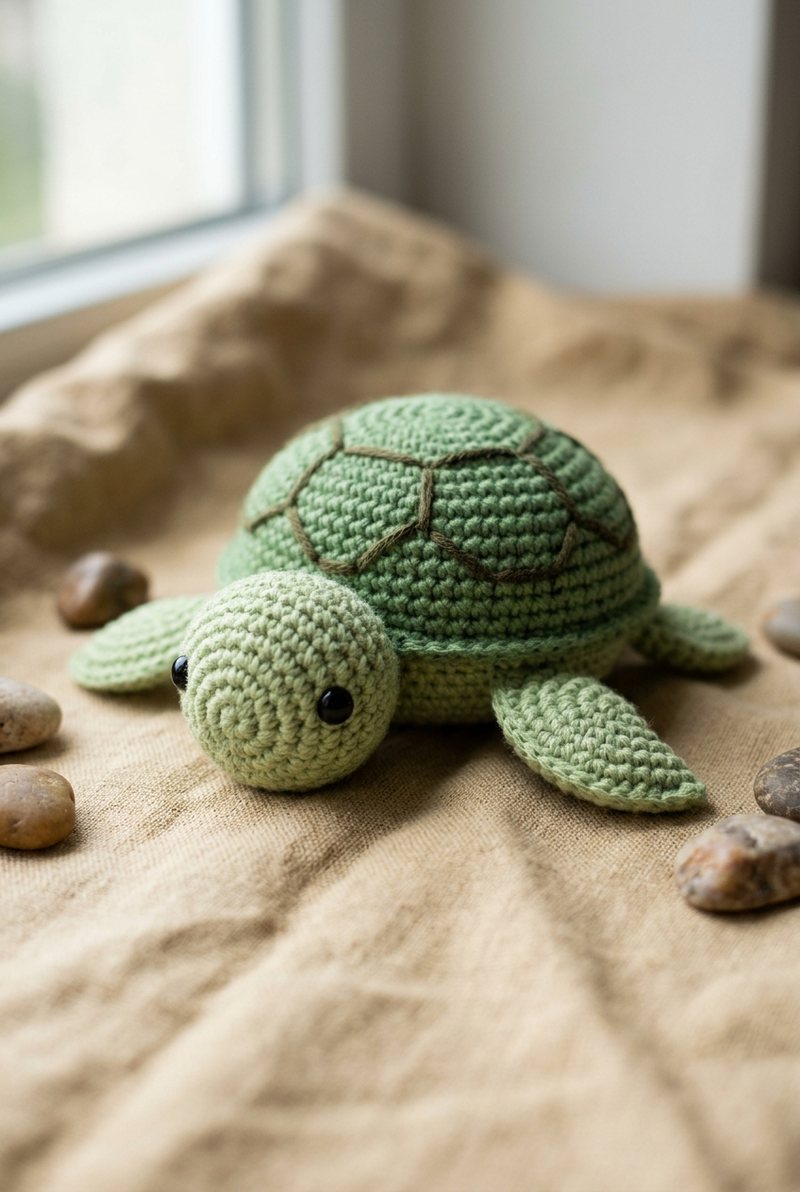
Shelly is a chubby little turtle with a domed green shell, dark embroidered hexagon lines, a light-green underside, four flippers and a tiny tail.
Crochet the pieces in spiral rounds with sport-weight cotton and a 2.5 mm hook, then sew them together so Shelly sits low and steady.
Looking for another animal? See all our crochet animal patterns in one place, sorted by farm, wild, ocean, pets and fantasy.
Shelly the Turtle Free Crochet Pattern
What You’ll Need
- Sport / fine (size 2) cotton yarn: sport-weight cotton in medium green, light green and dark green, plus a little black for embroidered details; 2.5 mm hook
- 2.5 mm crochet hook (a hook smaller than the yarn label suggests keeps the stitches tight)
- 8 to 10 mm safety eyes (or black yarn to embroider them)
- Fiberfill stuffing
- Tapestry needle, sewing pins and a stitch marker
The finished size depends on your yarn and hook: thicker yarn and a bigger hook make a bigger piece.
Abbreviations (US terms)
- MR magic ring
- sc single crochet
- inc increase: 2 sc in the same stitch
- dec decrease (an invisible decrease gives the smoothest finish)
- ch chain
- sl st slip stitch
- R round; Row row worked flat; the number in brackets is the stitch count at the end
Shell and Underside
Make the shell as an open dome and embroider its hexagon lines before joining it to the flat underside.
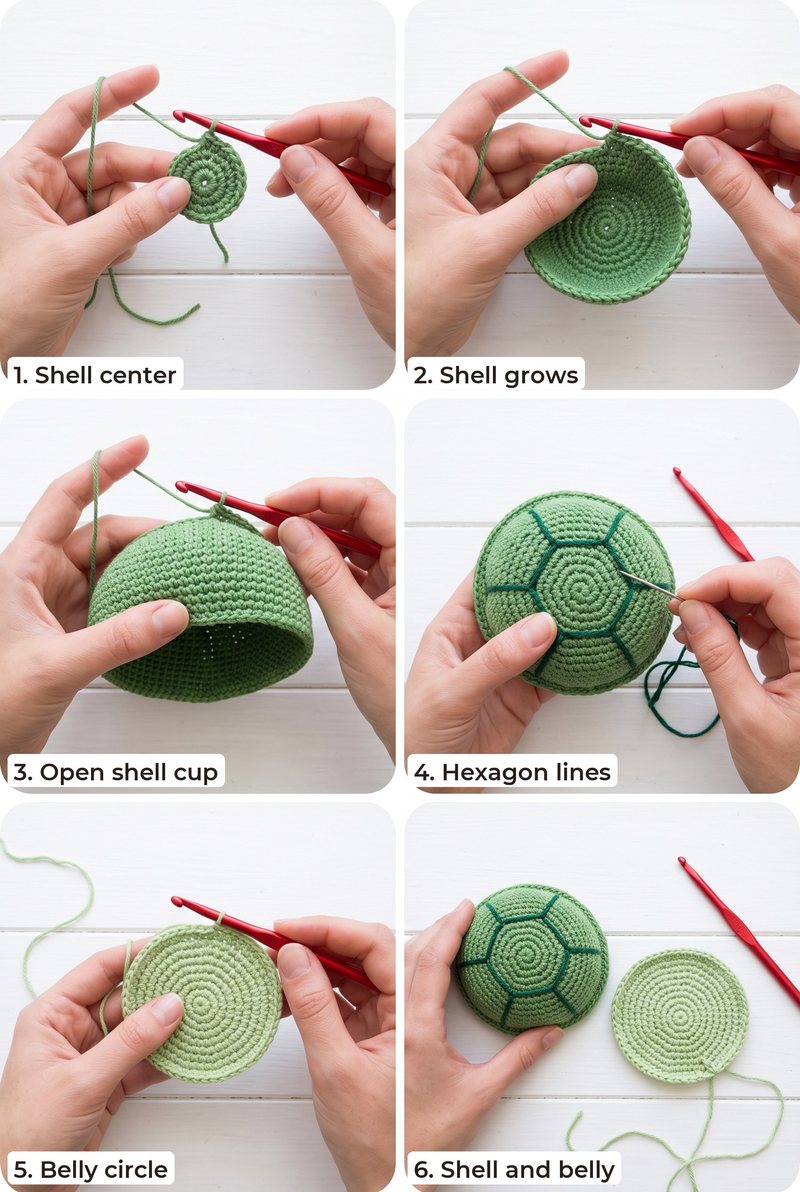
Shell (medium green, with dark-green embroidery, make 1)
- R1: 6 sc in a magic ring (6)
- R2: inc ×6 (12)
- R3: (1 sc, inc) ×6 (18)
- R4: (2 sc, inc) ×6 (24)
- R5: (3 sc, inc) ×6 (30)
- R6: (4 sc, inc) ×6 (36)
- R7: (5 sc, inc) ×6 (42)
- R8-12: sc around (42)
- Fasten off, leaving a long sewing tail. Embroider dark-green lines on the outside in a hexagon pattern, meeting around a small center plate. Leave the lower edge open for joining.
Underside (light green, make 1)
- R1: 6 sc in a magic ring (6)
- R2: inc ×6 (12)
- R3: (1 sc, inc) ×6 (18)
- R4: (2 sc, inc) ×6 (24)
- R5: (3 sc, inc) ×6 (30)
- R6: (4 sc, inc) ×6 (36)
- R7: (5 sc, inc) ×6 (42)
- Fasten off, leaving a long tail for sewing.
Head, Flippers and Tail
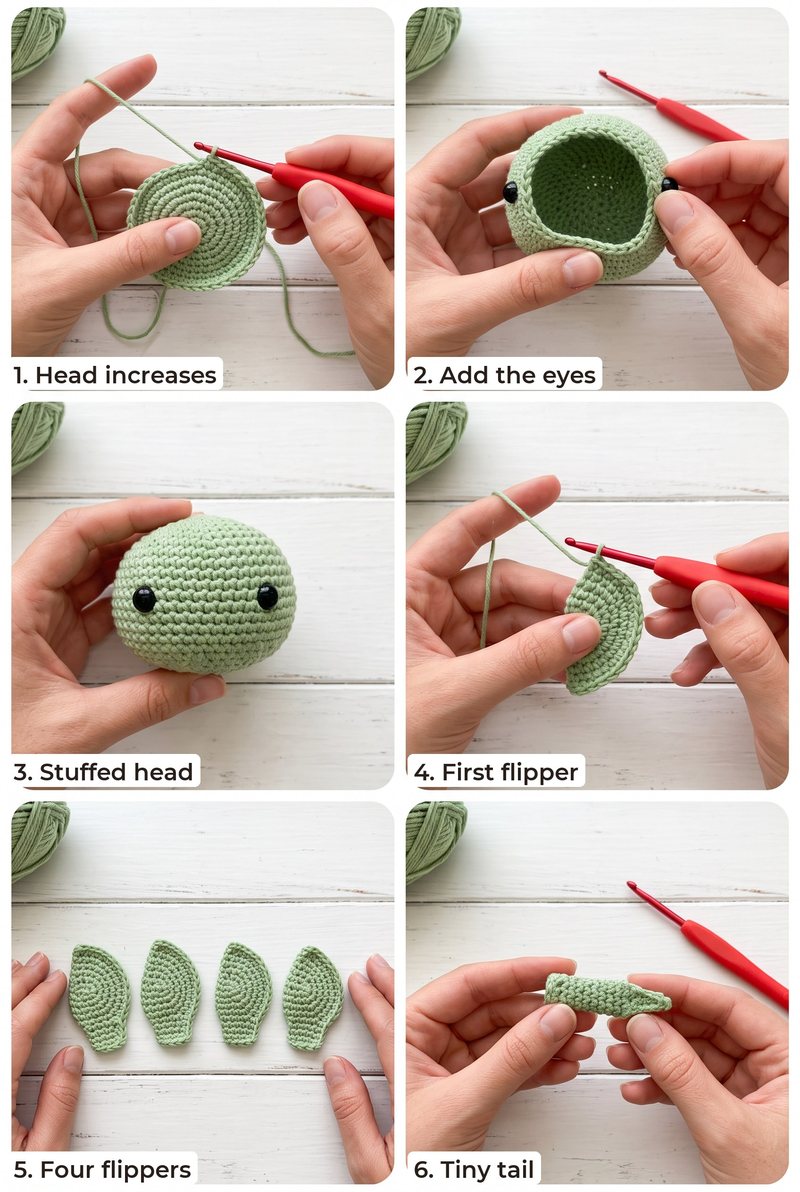
Head (light green, make 1)
- R1: 6 sc in a magic ring (6)
- R2: inc ×6 (12)
- R3: (1 sc, inc) ×6 (18)
- R4: (2 sc, inc) ×6 (24)
- R5: (3 sc, inc) ×6 (30)
- R6-7: sc around (30)
- Insert two safety eyes 6 stitches apart. For a baby-safe toy, embroider the eyes instead.
- R8-9: sc around (30)
- R10: (3 sc, dec) ×6 (24)
- R11: (2 sc, dec) ×6 (18)
- R12: (1 sc, dec) ×6 (12)
- Stuff firmly, then keep stuffing as you close.
- R13: dec ×6 (6)
- Fasten off and pull the opening closed, leaving a tail to sew the head to the body.
Flippers (light green, make 4)
- R1: 6 sc in a magic ring (6)
- R2: inc ×6 (12)
- R3-4: sc around (12)
- R5: (1 sc, dec) ×4 (8)
- Stuff very lightly, then flatten the opening.
- Close: 4 sc through both layers (4)
- Fasten off, leaving a tail to sew each flipper to the sides of the shell.
Tail (light green, make 1)
- R1: 6 sc in a magic ring (6)
- R2-3: sc around (6)
- Close: 3 sc through both layers (3)
- Fasten off, leaving a tail to sew the tail to the back of the shell.
Assembly
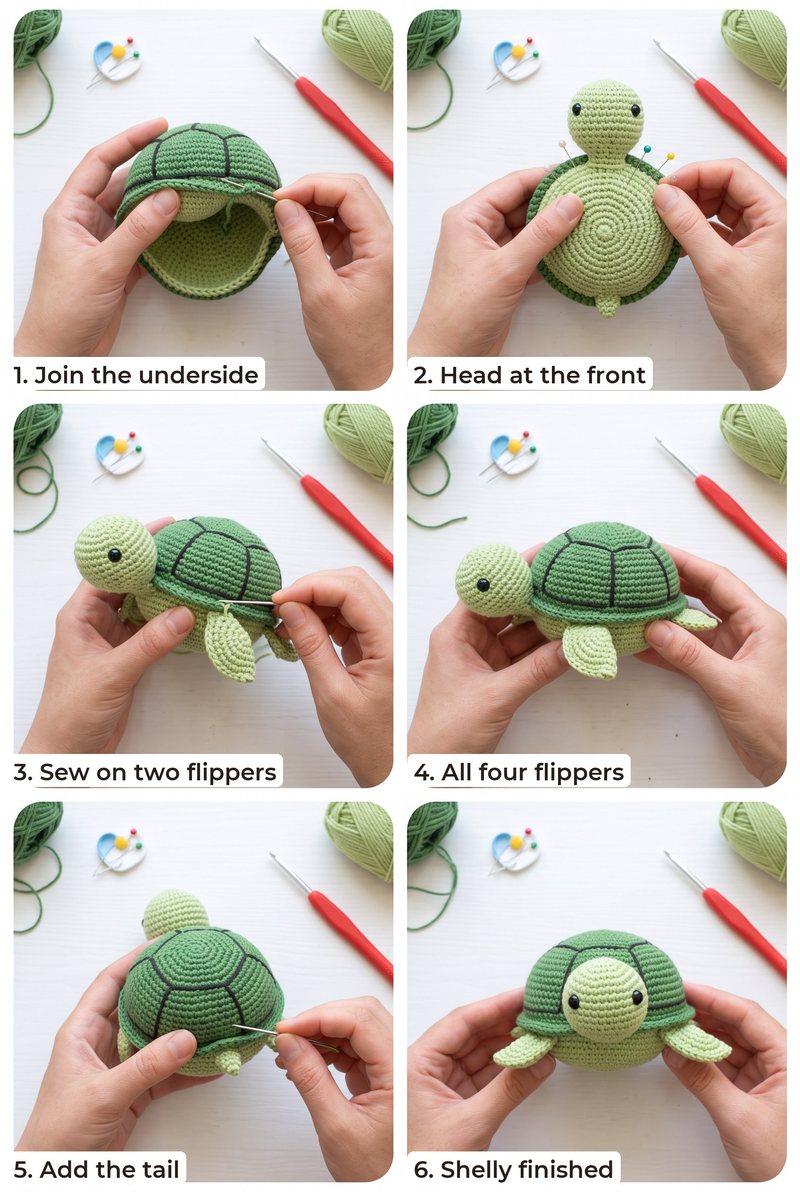
- Lightly stuff the shell dome. Sew the light-green underside around its open edge, adding a little stuffing before closing the seam.
- Sew the head to the front of the shell, with the eyes facing forward.
- Sew two flippers to each side of the shell, with their flattened edges against the underside.
- Sew the tiny tail to the back of the shell. Weave in all ends.
Make a Teal Sea Turtle Version
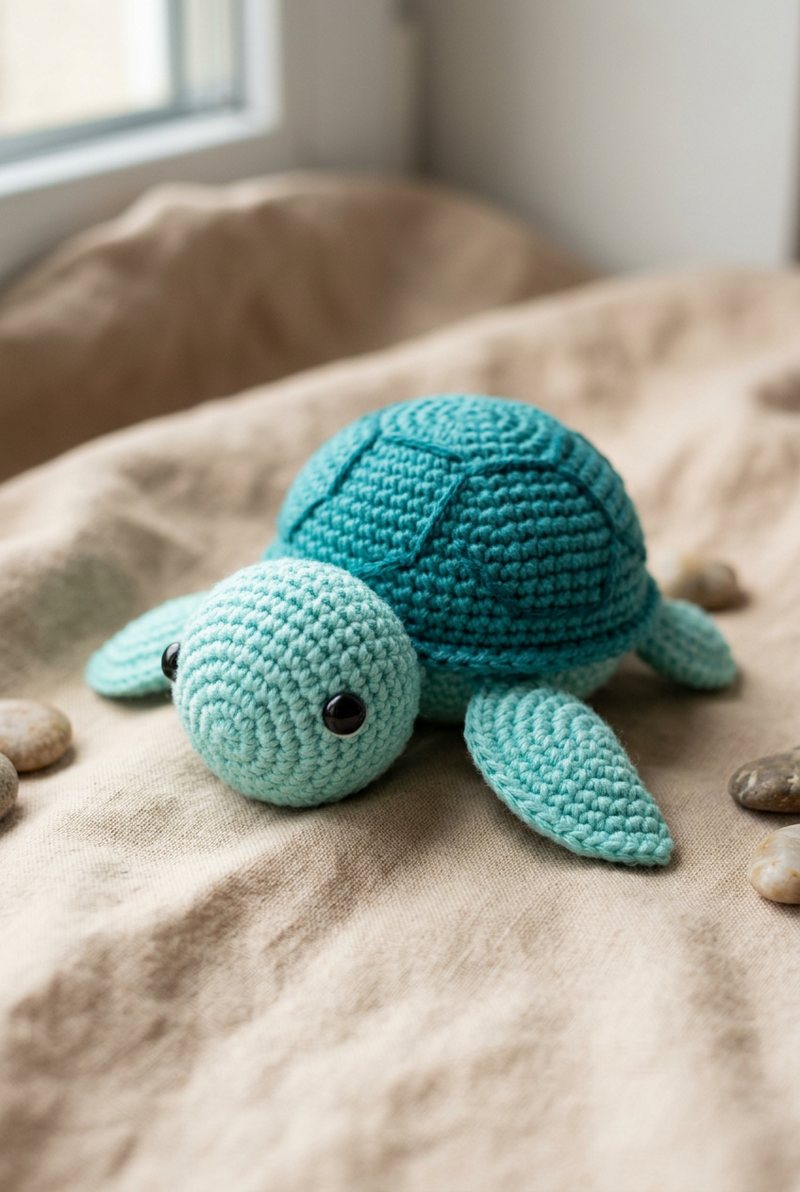
Use teal for the shell, aqua for the underside, head, flippers and tail, and dark teal for the embroidered shell lines.
FAQ
Can I embroider the eyes instead?
Yes. Embroider two small eyes in place of safety eyes, especially if the turtle will be handled by a young child.
How do I make the shell lines?
Use dark-green yarn and a yarn needle to stitch a small center plate with hexagon outlines radiating across the shell.
Can I change the shell color?
Yes. Teal with dark-teal lines and an aqua underside makes a sea turtle variation.
More Free Patterns You Will Love
Love these patterns? Get new ones in your Pinterest feed.
Follow us on Pinterest