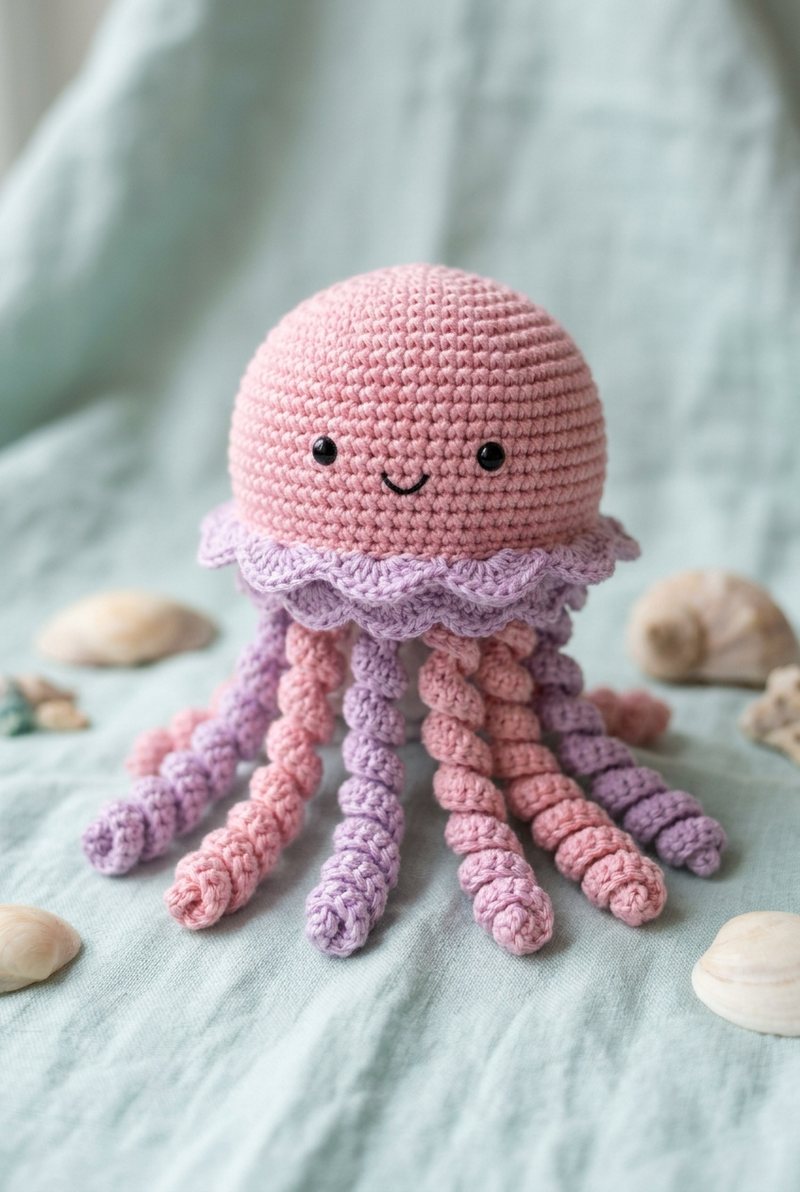
Jelly is a soft little jellyfish with a rounded pink dome, a sweet embroidered face, a lacy lilac frill and eight curly tentacles in pink and lilac.
Crochet the dome and tentacles in spiral rounds, then add the frill through a round of free loops. The pale blue variation gives Jelly a cool ocean look.
Looking for another animal? See all our crochet animal patterns in one place, sorted by farm, wild, ocean, pets and fantasy.
Jelly the Jellyfish Free Crochet Pattern
What You’ll Need
- Sport / fine (size 2) cotton yarn: sport-weight cotton yarn in pink and lilac, plus black and a little white for the face
- 2.5 mm crochet hook (a hook smaller than the yarn label suggests keeps the stitches tight)
- 8 to 10 mm safety eyes (or black yarn to embroider them)
- Fiberfill stuffing
- Tapestry needle, sewing pins and a stitch marker
The finished size depends on your yarn and hook: thicker yarn and a bigger hook make a bigger piece.
Abbreviations (US terms)
- MR magic ring
- sc single crochet
- inc increase: 2 sc in the same stitch
- dec decrease (an invisible decrease gives the smoothest finish)
- ch chain
- sl st slip stitch
- BLO back loops only
- dc double crochet
- R round; Row row worked flat; the number in brackets is the stitch count at the end
Dome and Lace Frill
The dome is shaped from a small circle and closed flat at the bottom. Its back-loop round leaves a line of loops for the frill.
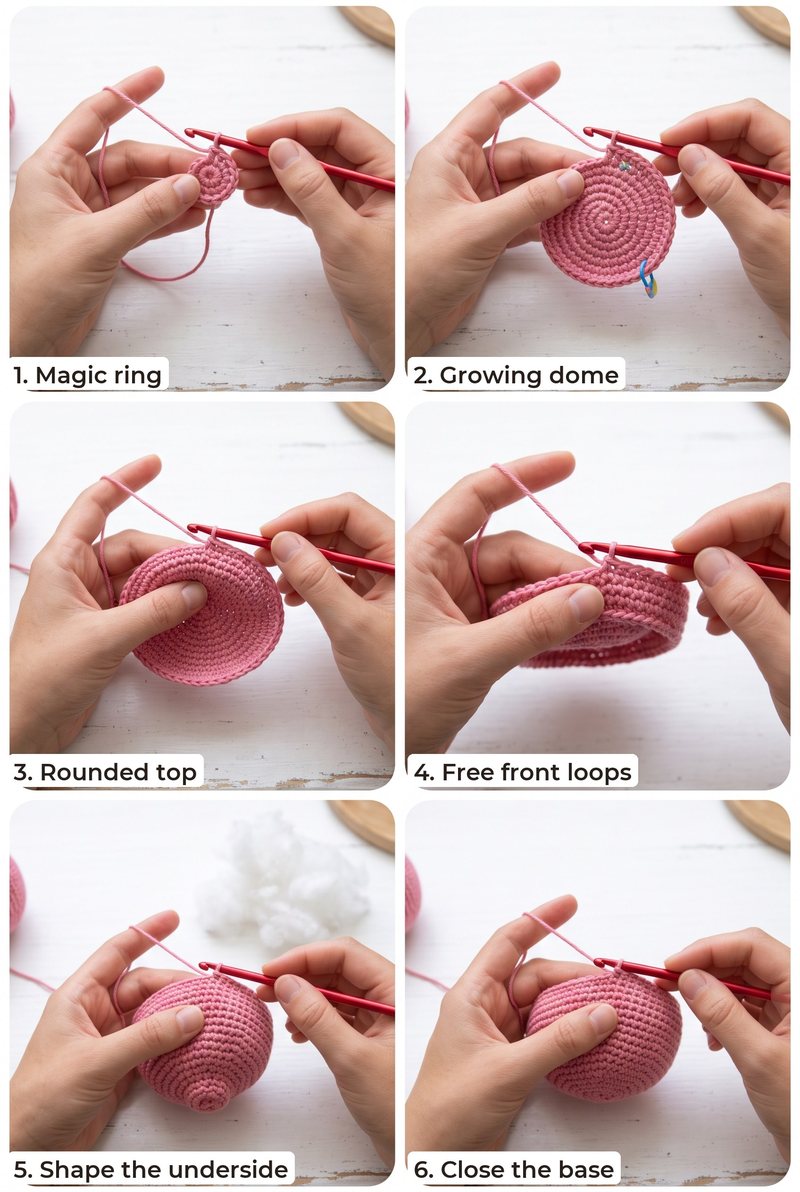
Dome (pink, make 1)
- R1: 6 sc in a magic ring (6)
- R2: inc ×6 (12)
- R3: (1 sc, inc) ×6 (18)
- R4: (2 sc, inc) ×6 (24)
- R5: (3 sc, inc) ×6 (30)
- R6: (4 sc, inc) ×6 (36)
- R7: (5 sc, inc) ×6 (42)
- R8: (6 sc, inc) ×6 (48)
- R9-11: sc around (48)
- R12: sc in back loops only around; Work one round in back loops only; keep the front loops free for the lace frill. (48)
- R13: (6 sc, dec) ×6 (42)
- R14: (5 sc, dec) ×6 (36)
- R15: (4 sc, dec) ×6 (30)
- R16: (3 sc, dec) ×6 (24)
- Stuff the dome firmly and keep stuffing as you close.
- R17: (2 sc, dec) ×6 (18)
- R18: (1 sc, dec) ×6 (12)
- Close: 6 sc through both layers (6)
- Fasten off and weave in the end. The closed, flattened side is the bottom.
Lace Frill
Work the lilac scallops into the loops left free under the dome.
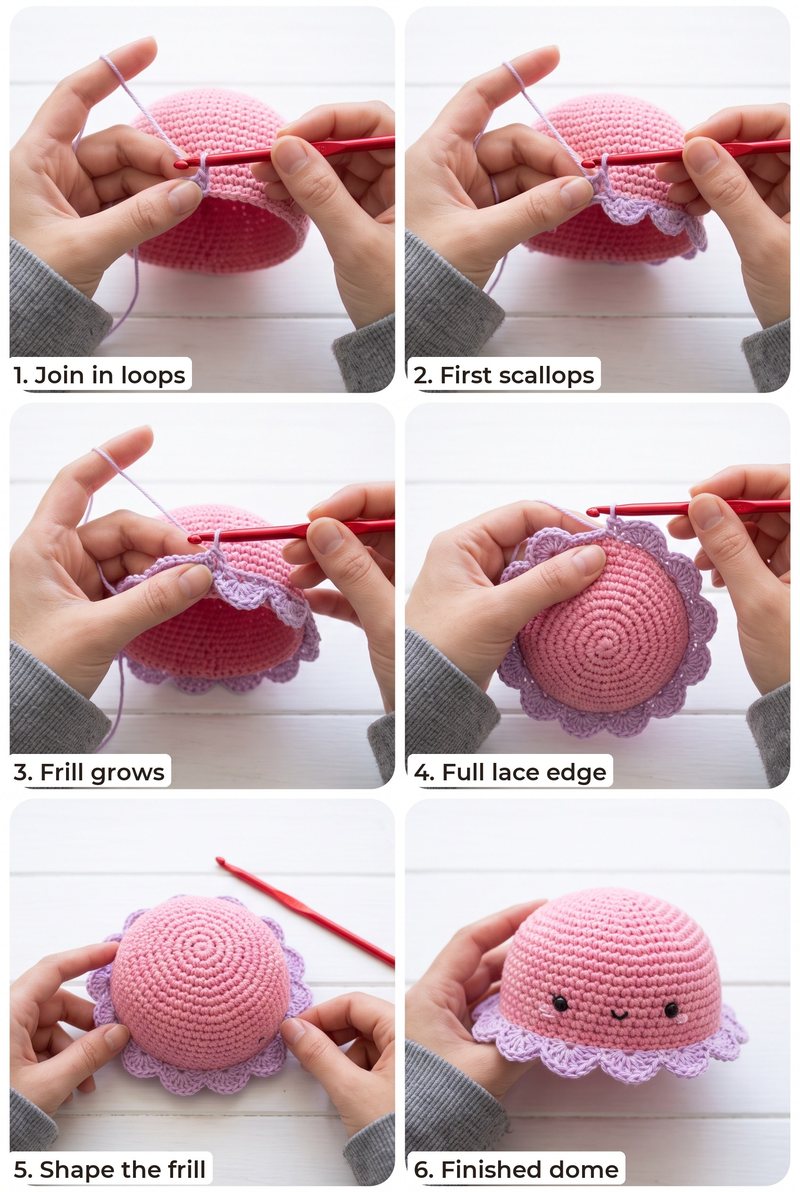
Lace frill (lilac, make 1)
- Join lilac in a free front loop from the BLO round, with the dome held right side out.
- R1: Repeat: ch 3, skip 2 loops, sl st in the next loop to make a small scallop. ×16
- Fasten off and weave in the end. Let the frill curl gently around the dome.
Tentacles and Assembly
Make eight corkscrew curls, then sew them around the base and embroider Jelly's face.
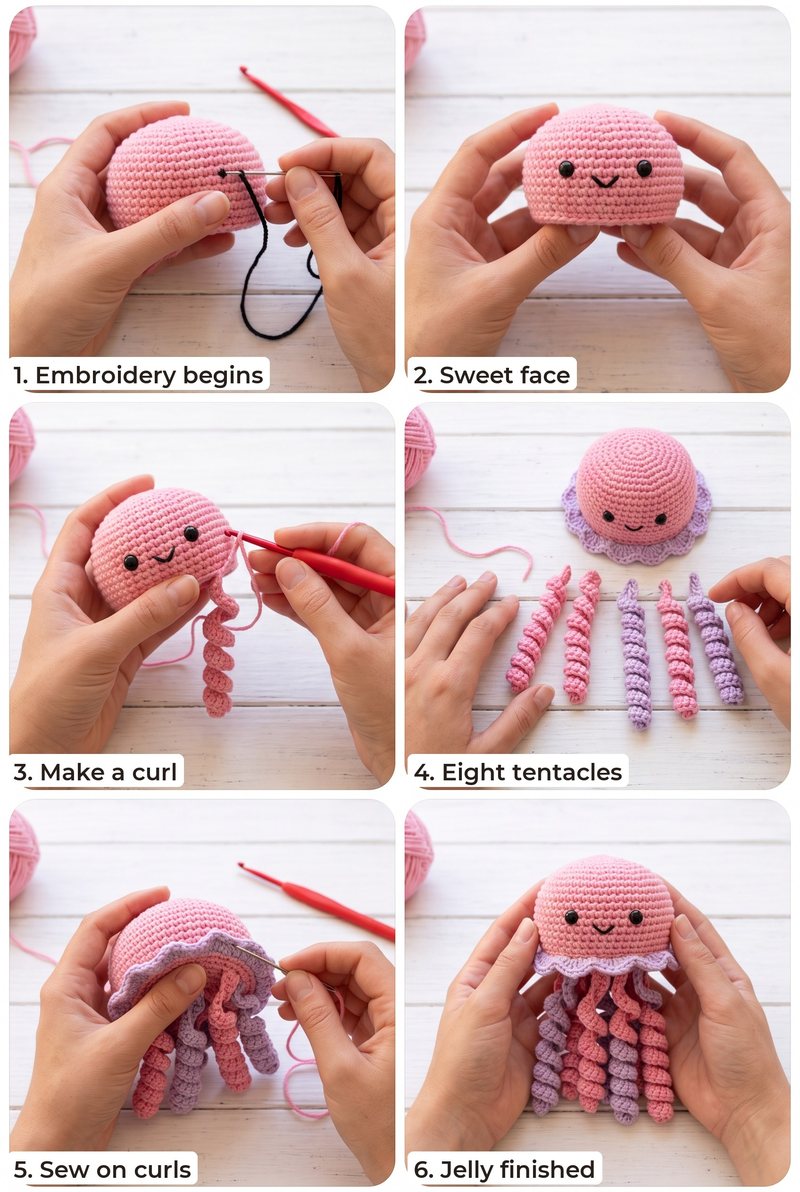
Curly tentacles (pink and lilac, make 8 (4 pink, 4 lilac))
- Ch 25. Row 1: 3 sc in the 2nd ch from the hook and in each ch across (72)
- Make each tentacle as a 24-stitch corkscrew curl, alternating pink and lilac. Fasten off with a long sewing tail.
- With black yarn, embroider two small eyes on the front of the dome. Add a tiny curved smile and optional white eye highlights.
- Sew the eight curls evenly around the flattened bottom of the dome, alternating pink and lilac.
- Weave in the remaining ends and shape the dome and frill with your hands.
Make a Pale Blue Jelly Version
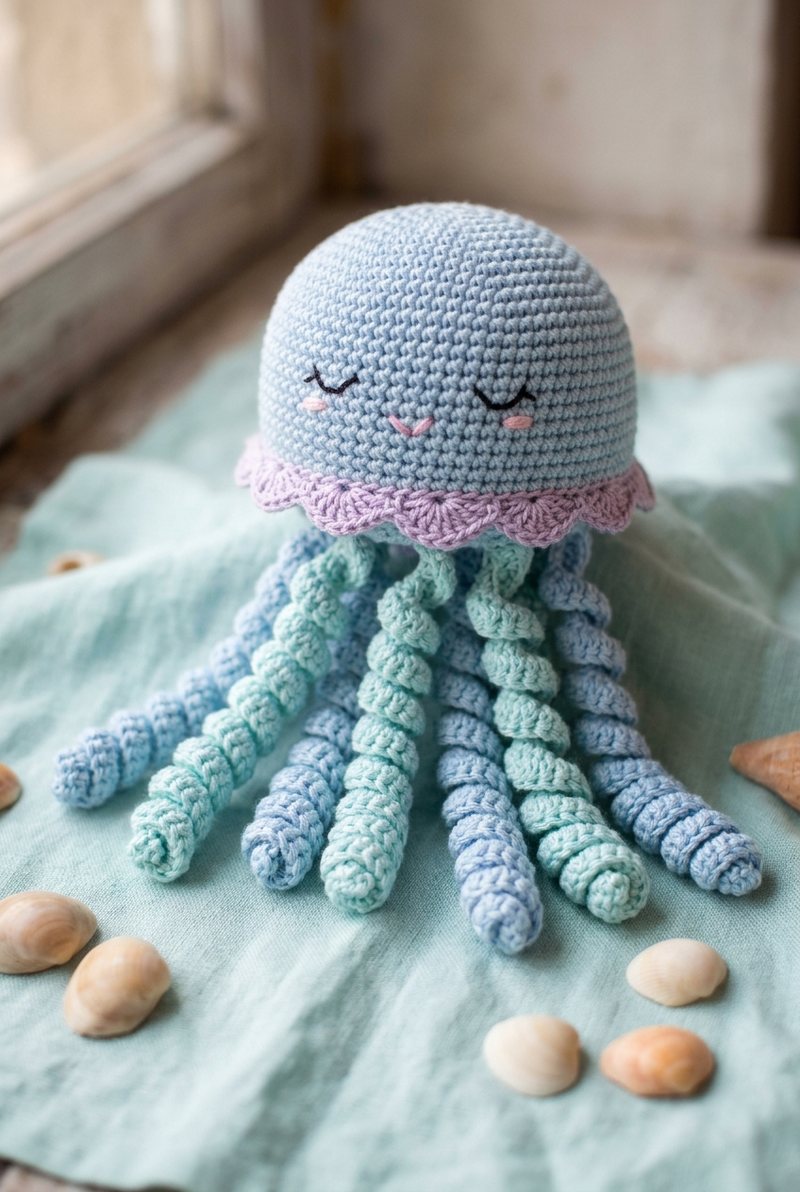
Use pale blue for the dome and lilac for the frill, then make the eight tentacles in pale blue and soft aqua.
FAQ
Can I embroider the eyes?
Yes. Embroidered eyes and a smile give the face a soft look. Use black yarn for the eyes and smile, with optional white highlights.
Can I change the frill colour?
Yes. Choose a contrasting shade for the lace, or use the same colour as the dome for a subtle edge.
How do I make the tentacles curl?
Work each one as a corkscrew curl, then sew its straight end securely around the flattened base.
More Free Patterns You Will Love
Love these patterns? Get new ones in your Pinterest feed.
Follow us on Pinterest