
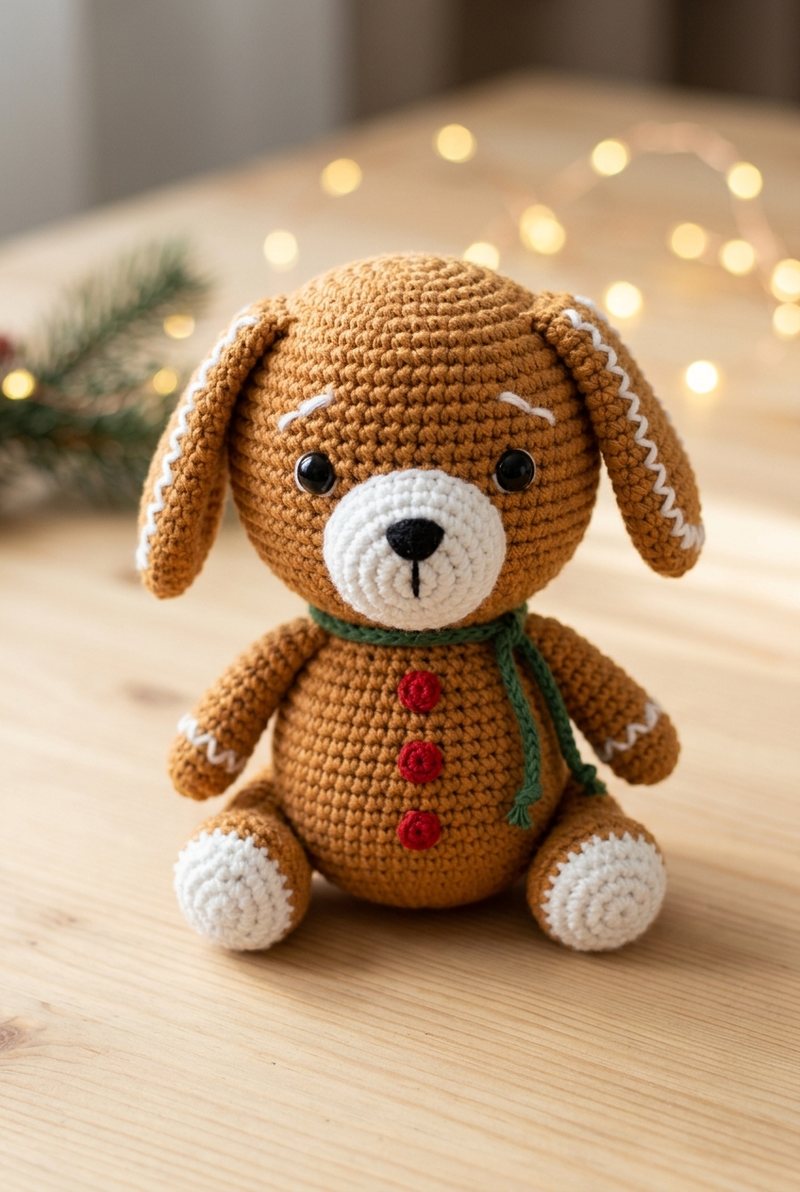
Ginger is a gingerbread puppy: a warm caramel body, floppy ears trimmed with white icing stitches, white icing paws, three little red buttons and a green cord scarf. He looks good enough to eat.
He uses our puppy base, so the shaping is simple single crochet. The icing is just white yarn embroidered on top. Step-by-step photos show every part, and there is a mint and pink version at the end.
Looking for another animal? See all our crochet animal patterns in one place, sorted by farm, wild, ocean, pets and fantasy.
Ginger the Gingerbread Pup Free Crochet Pattern
What You’ll Need
- Sport / fine (size 2) cotton yarn in caramel, white, red and green, plus a little black for the nose
- 2.5 mm crochet hook (a hook smaller than the yarn label suggests keeps the stitches tight)
- A pair of 10 mm safety eyes
- Fiberfill stuffing
- Tapestry needle, sewing pins and a stitch marker
The finished size depends on your yarn and hook: thicker yarn and a bigger hook make a bigger Ginger.
Abbreviations (US terms)
- MR magic ring
- sc single crochet
- inc increase: 2 sc in the same stitch
- dec decrease (use the invisible decrease for a smooth finish)
- sl st slip stitch
- ch chain
- R round; the number in brackets is the stitch count at the end of the round
Before You Start
- Work in continuous rounds and move a stitch marker to the first stitch of each round.
- New to safety eyes? See how to attach safety eyes to amigurumi.
- Stuff as you go; this guide on stuffing amigurumi keeps the shapes smooth.
Head
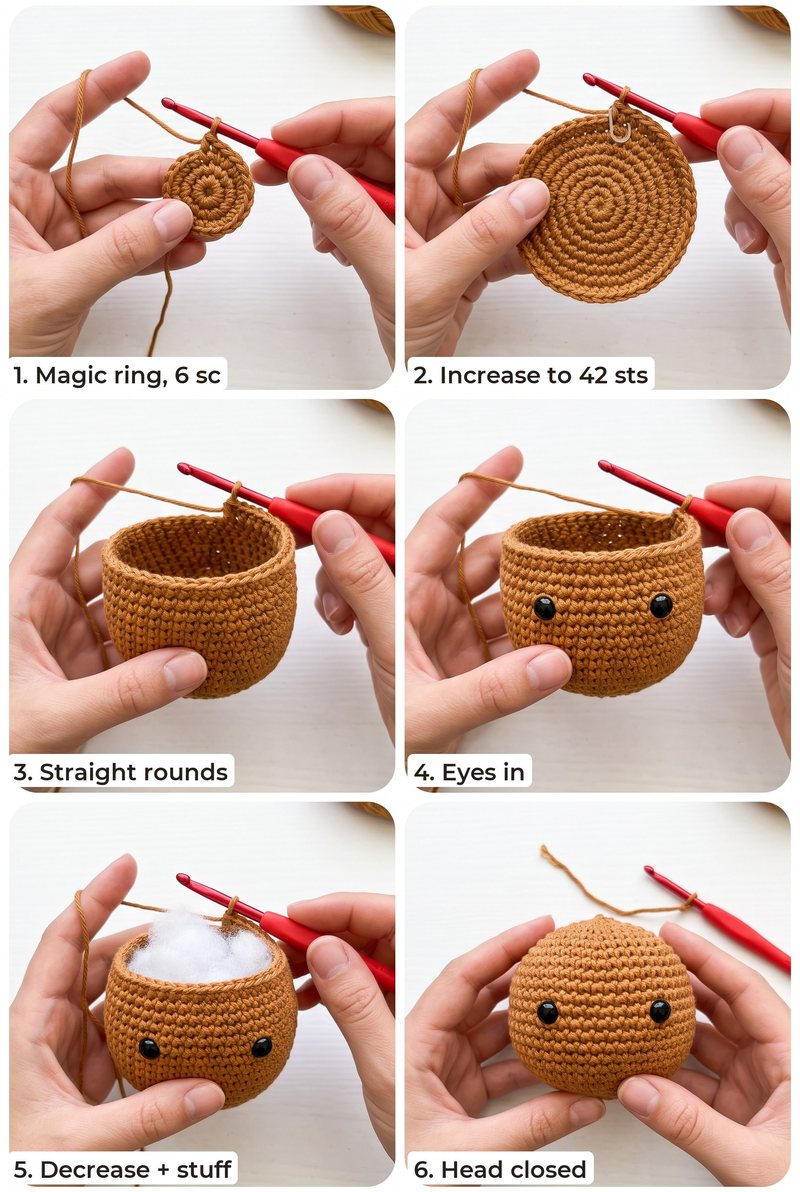
Head (caramel, make 1)
- R1: 6 sc in a magic ring (6)
- R2: inc ×6 (12)
- R3: (1 sc, inc) ×6 (18)
- R4: (2 sc, inc) ×6 (24)
- R5: (3 sc, inc) ×6 (30)
- R6: (4 sc, inc) ×6 (36)
- R7: (5 sc, inc) ×6 (42)
- R8-15: sc around (42)
- Insert 10 mm safety eyes between Rounds 12 and 13, 7 stitches apart.
- R16: (5 sc, dec) ×6 (36)
- R17: (4 sc, dec) ×6 (30)
- R18: (3 sc, dec) ×6 (24)
- Stuff the head firmly and keep stuffing as you close.
- R19: (2 sc, dec) ×6 (18)
- R20: (1 sc, dec) ×6 (12)
- R21: dec ×6 (6)
- Fasten off, weave the tail through the front loops and pull the hole closed.
Face and Details
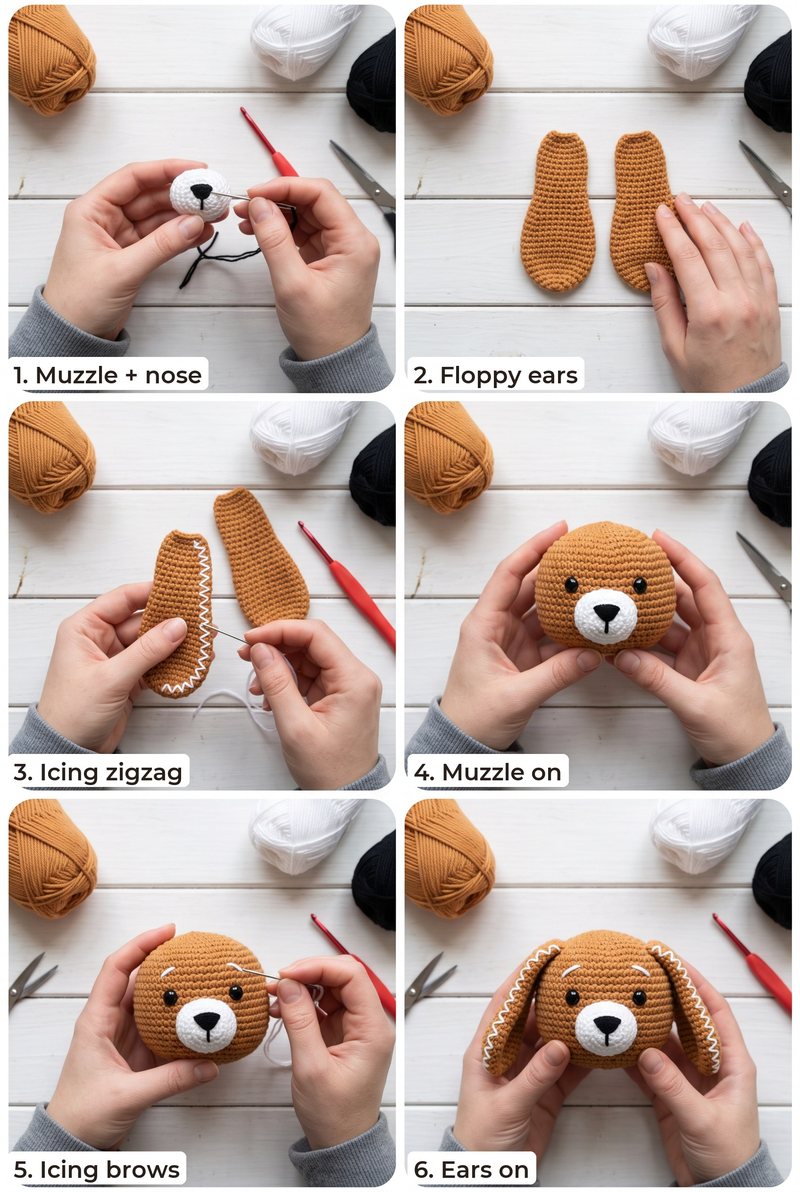
Muzzle (white, make 1)
- R1: 6 sc in a magic ring (6)
- R2: inc ×6 (12)
- R3: (1 sc, inc) ×6 (18)
- R4-5: sc around (18)
- Fasten off, leaving a long tail. Embroider the nose over Rounds 1-2, then sew the muzzle between the eyes, stuffing it lightly.
Ears (caramel, make 2)
- R1: 6 sc in a magic ring (6)
- R2: (1 sc, inc) ×3 (9)
- R3: (2 sc, inc) ×3 (12)
- R4-8: sc around (12)
- R9: (1 sc, dec) ×4 (8)
- Do not stuff. Flatten the ear.
- Close: 4 sc through both layers (4)
- Fasten off. Embroider a white zigzag of icing along the edge, then sew the ears to the sides of the head over Rounds 6-7 so they hang down.
Body and Limbs
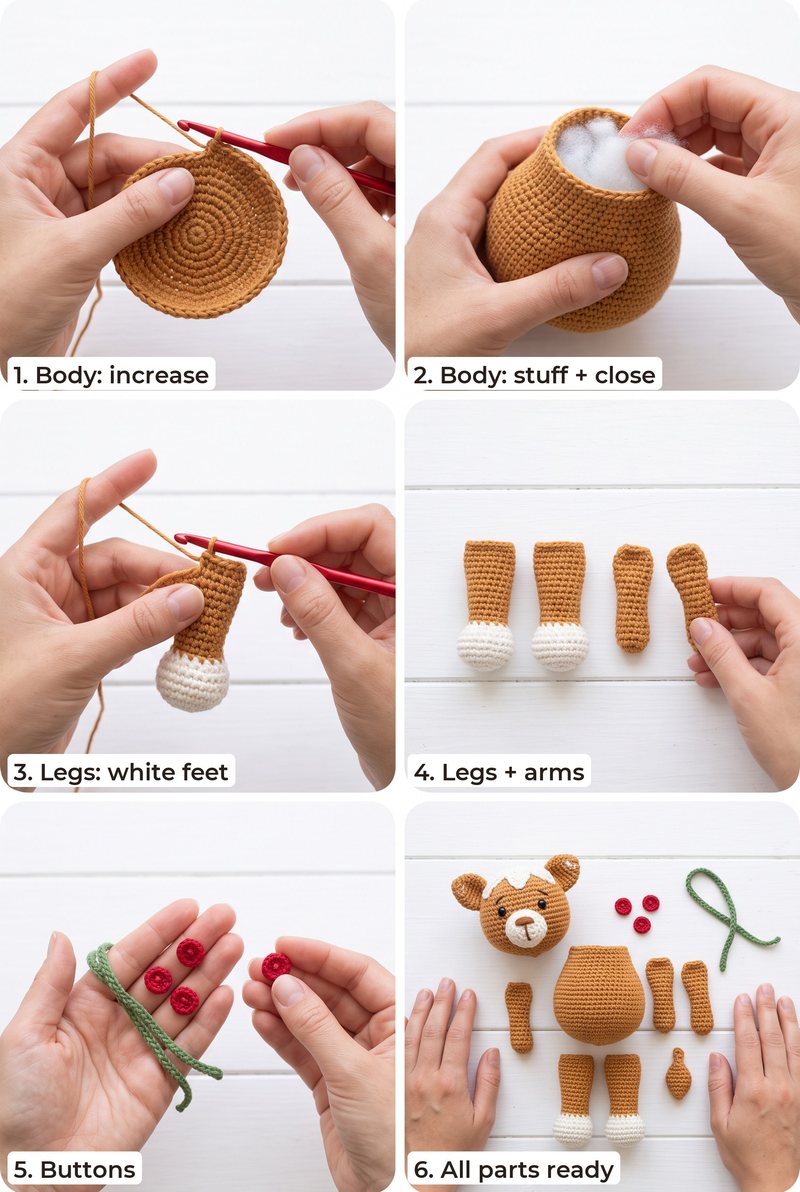
Body (caramel, make 1)
- R1: 6 sc in a magic ring (6)
- R2: inc ×6 (12)
- R3: (1 sc, inc) ×6 (18)
- R4: (2 sc, inc) ×6 (24)
- R5: (3 sc, inc) ×6 (30)
- R6-10: sc around (30)
- R11: (3 sc, dec) ×6 (24)
- R12-13: sc around (24)
- R14: (2 sc, dec) ×6 (18)
- R15: sc around (18)
- Stuff firmly. Fasten off, leaving a long tail to sew the body to the head.
Legs (white, then caramel, make 2)
- R1: 6 sc in a magic ring (6)
- R2: inc ×6 (12)
- R3-4: sc around (12)
- Change to caramel.
- R5: (4 sc, dec) ×2 (10)
- R6-8: sc around (10)
- Stuff the foot lightly, then flatten the top.
- Close: 5 sc through both layers (5)
- Fasten off and sew the legs to the bottom front of the body so the toy sits.
Arms (white, then caramel, make 2)
- R1: 6 sc in a magic ring (6)
- R2: (2 sc, inc) ×2 (8)
- Change to caramel.
- R3-9: sc around (8)
- Stuff only the bottom half. Flatten the top.
- Close: 4 sc through both layers (4)
- Fasten off and sew to the sides of the body just below the neck.
Buttons (red, make 3)
- R1: 6 sc in a magic ring (6)
- Slip stitch to join and fasten off. Sew three buttons down the front of the body.
Tail (caramel, make 1)
- R1: 6 sc in a magic ring (6)
- R2: (2 sc, inc) ×2 (8)
- R3-4: sc around (8)
- Close: 4 sc through both layers (4)
- Fasten off and sew to the back of the body near the bottom.
Scarf (green, make 1)
- Ch 46. Row 1: sl st in the 2nd ch from the hook and in each ch across (45)
- Fasten off. Wrap the cord around the neck and tie a loose knot at the side, letting the ends hang.
Assembly
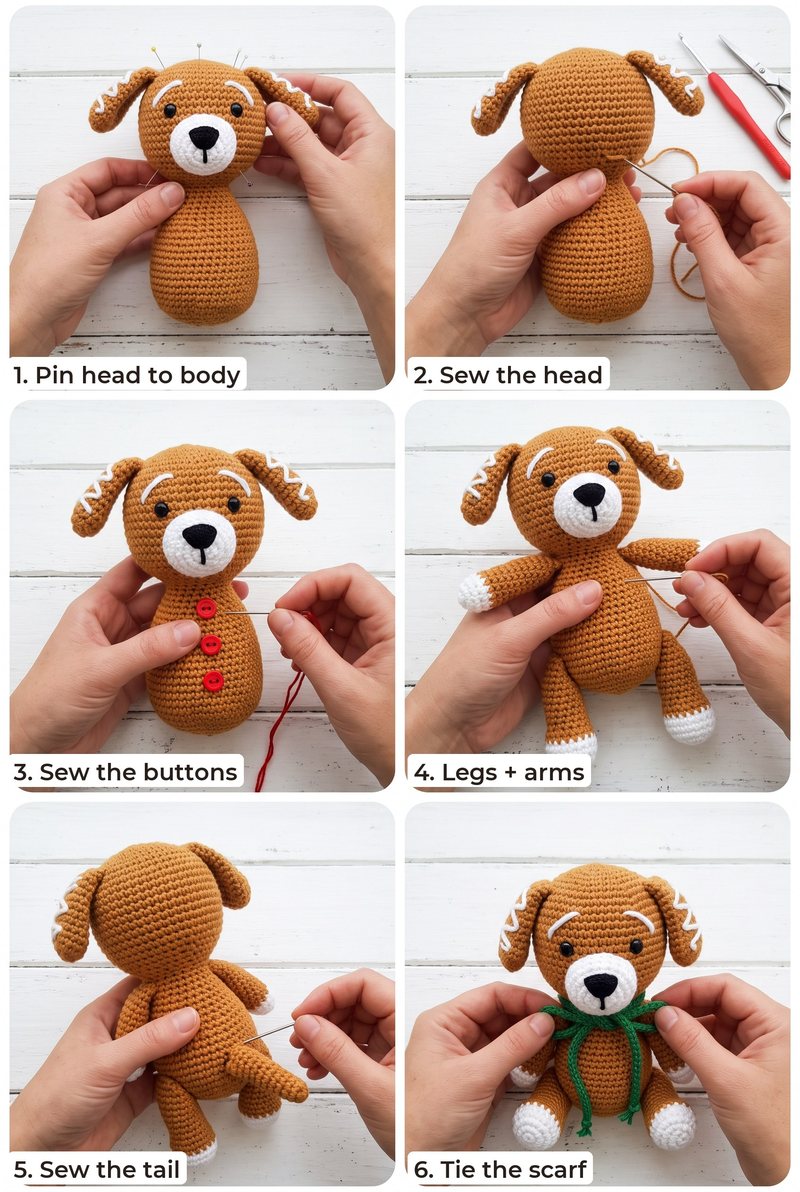
- Sew the white muzzle between the eyes and embroider a black nose.
- Embroider white icing zigzags on the ears and a small curve over each eye, then sew on the ears.
- Sew the head to the body and sew the three red buttons down the front.
- Sew the legs to the bottom front so the pup sits, then the arms and the tail.
- Tie the green scarf around the neck.
For invisible seams, follow how to sew amigurumi pieces together, and for the nose see how to embroider faces on amigurumi.
Make a Mint and pink gingerbread pup
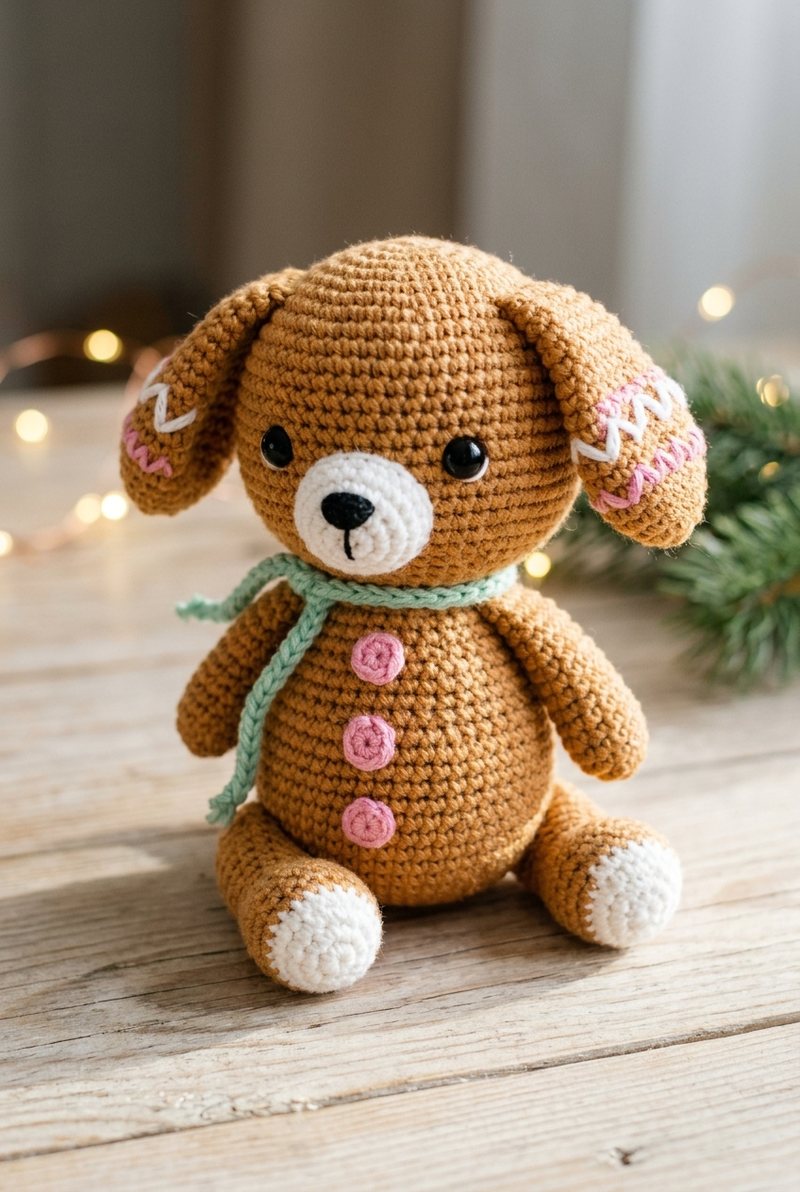
Keep the caramel body, make the buttons pink and the scarf mint, and add pink icing next to the white.
FAQ
How do I embroider the icing?
Use white yarn and a tapestry needle. Small back stitches in a zigzag along the ear edge look like piped icing; keep them loose so the ear stays flat.
Can I make a gingerbread person instead?
This pattern is shaped as a puppy. Skip the ears and muzzle and add round ears for a gingerbread bear.
Is it safe for babies?
Safety eyes can come loose with hard play. For a baby, embroider the eyes with black yarn instead.
More Free Patterns You Will Love
Love these patterns? Get new ones in your Pinterest feed.
Follow us on Pinterest