
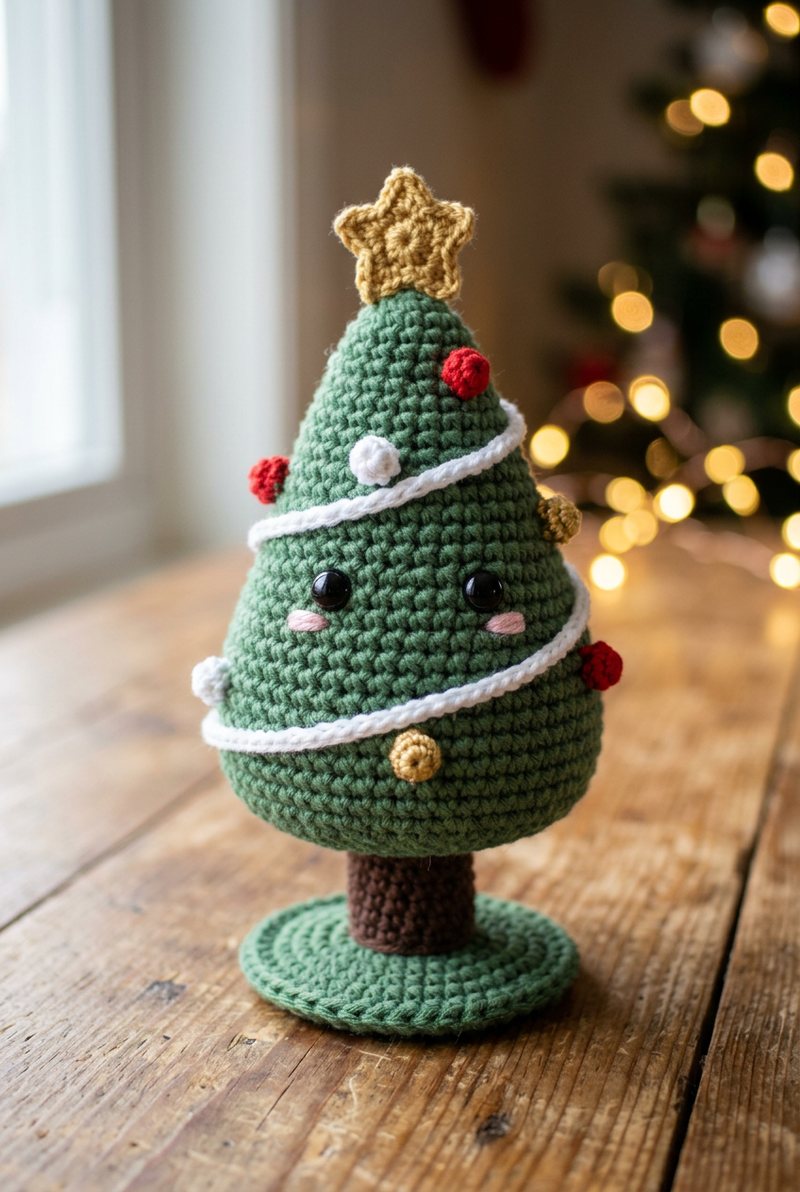
Pine is a chubby little Christmas tree with safety eyes, pink cheeks, six tiny round ornaments, a white spiral garland and a two-layer gold star. A flat base and short brown trunk help Pine sit upright.
Make Pine in sport cotton with a 2.5 mm hook, working in spiral rounds of single crochet. The photo steps show how the cone, decorations and star come together.
Pine the Christmas Tree Free Crochet Pattern
What You’ll Need
- Sport / fine (size 2) cotton yarn: sport-weight cotton in green, brown, gold, white, red and pink, plus a little black for embroidered details if desired
- 2.5 mm crochet hook (a hook smaller than the yarn label suggests keeps the stitches tight)
- 8 to 10 mm safety eyes (or black yarn to embroider them)
- Fiberfill stuffing
- Tapestry needle, sewing pins and a stitch marker
The finished size depends on your yarn and hook: thicker yarn and a bigger hook make a bigger piece.
Abbreviations (US terms)
- MR magic ring
- sc single crochet
- inc increase: 2 sc in the same stitch
- dec decrease (an invisible decrease gives the smoothest finish)
- ch chain
- sl st slip stitch
- BLO back loops only
- dc double crochet
- R round; Row row worked flat; the number in brackets is the stitch count at the end
Tree Body and Base
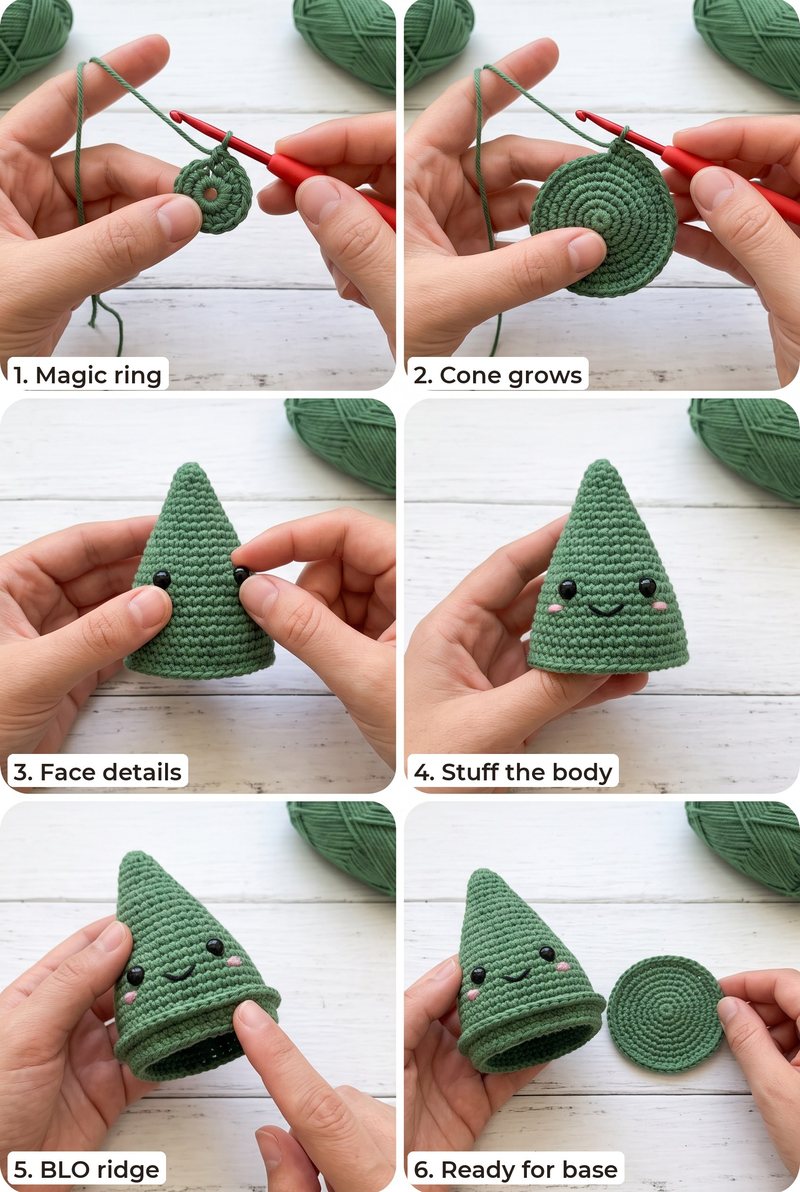
Start at the top of the tree and increase out to shape the cone. The back-loop-only round makes a ridge for sewing on the flat base.
Tree body (green, make 1)
- R1: 6 sc in a magic ring (6)
- R2: inc ×6 (12)
- R3: (1 sc, inc) ×6 (18)
- R4: (2 sc, inc) ×6 (24)
- R5: (3 sc, inc) ×6 (30)
- R6: (4 sc, inc) ×6 (36)
- R7-10: sc around (36)
- Insert safety eyes between Rounds 7 and 8, about 6 stitches apart. Embroider a small smile and pink cheeks. Stuff the tree firmly, keeping the lower edge open.
- R11: sc in back loops only around; Work this round in back loops to make the flat-base ridge; leave the front loops free for sewing. (36)
- Fasten off, leaving a long tail to sew the base to the open lower edge.
Flat base (green, make 1)
- R1: 6 sc in a magic ring (6)
- R2: inc ×6 (12)
- R3: (1 sc, inc) ×6 (18)
- R4: (2 sc, inc) ×6 (24)
- R5: (3 sc, inc) ×6 (30)
- R6: (4 sc, inc) ×6 (36)
- Fasten off, leaving a long tail. Sew the disk to the tree body's free front loops, adding a little stuffing before closing.
Trunk and Ornaments
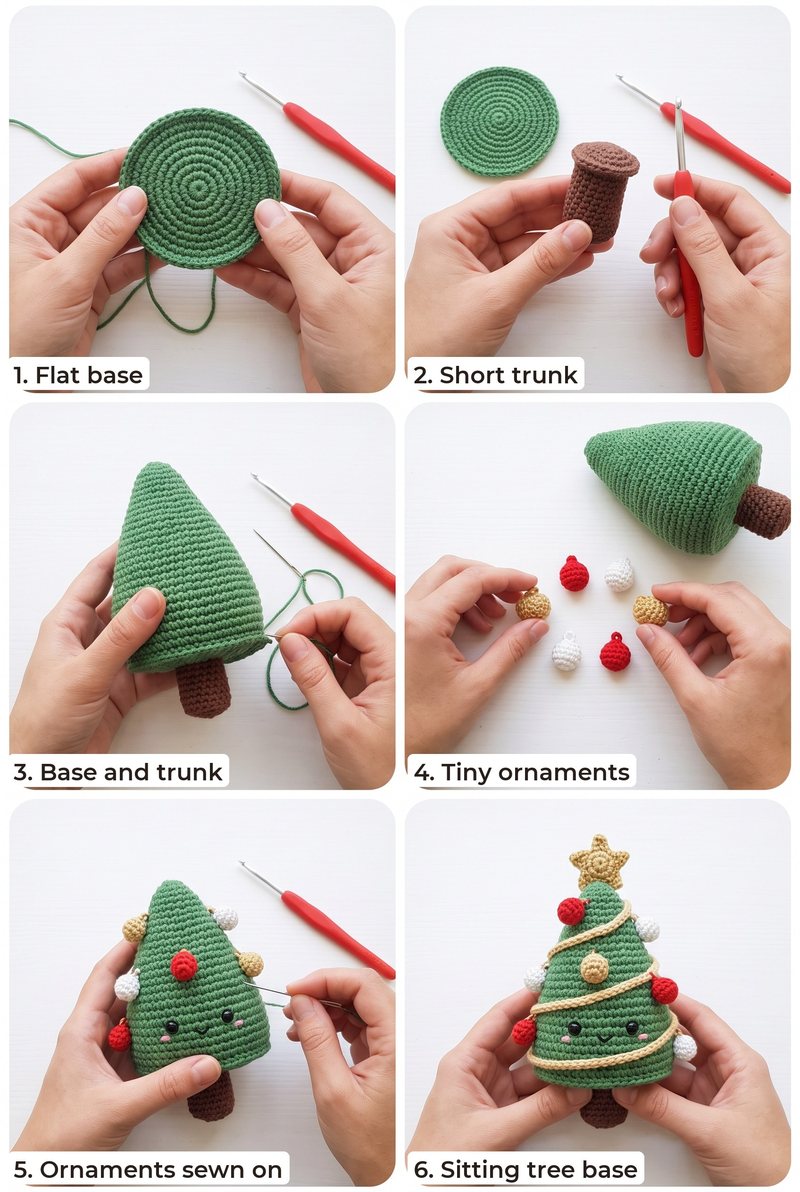
Brown trunk (brown, make 1)
- R1: 6 sc in a magic ring (6)
- R2-4: sc around (6)
- Flatten the opening and close it with 3 sc through both layers. Fasten off, leaving a tail to sew the trunk to the center underside of the base.
- Close: 3 sc through both layers (3)
Ornaments (red, white and gold, make 6)
- R1: 6 sc in a magic ring (6)
- R2: inc ×6 (12)
- R3: sc around (12)
- R4: dec ×6 (6)
- Stuff lightly before closing. Fasten off and pull the hole closed. Make two in each colour and sew them around the tree.
Garland and Star
White garland (white, make 1)
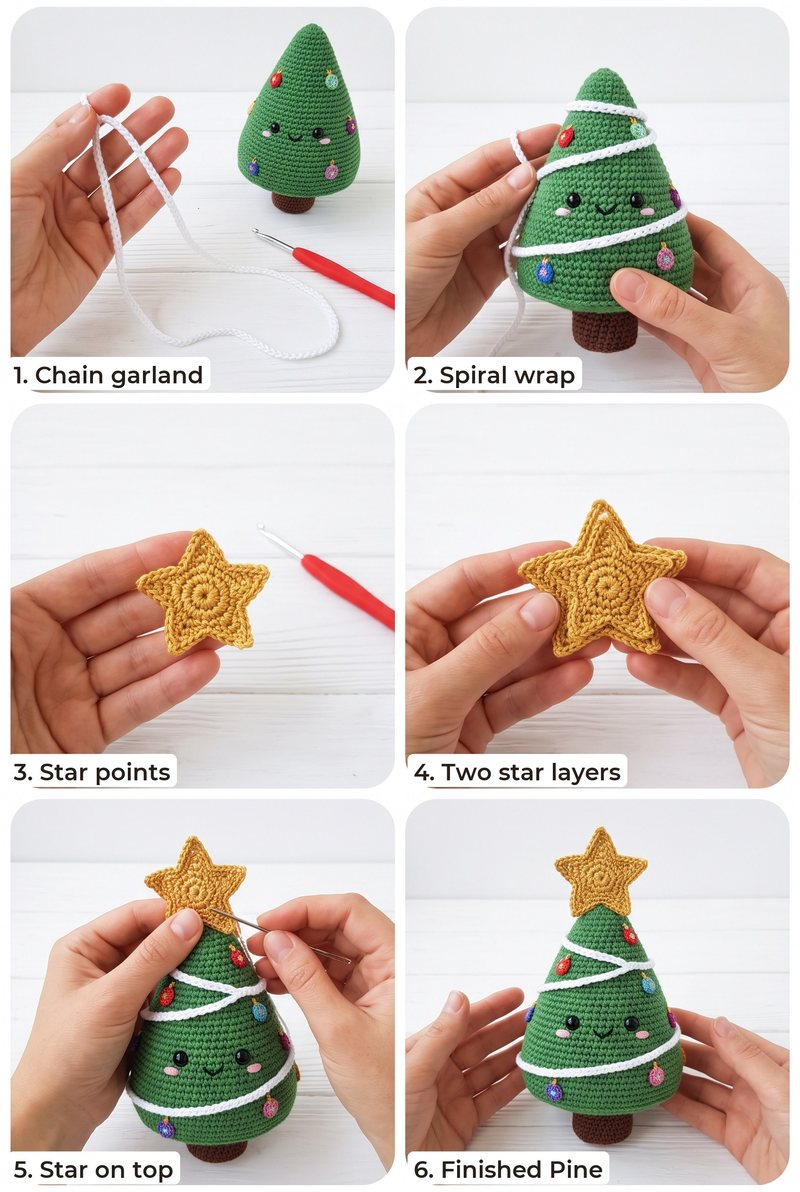
- Ch 54. Row 1: sl st in the 2nd ch from the hook and in each ch across (53)
- Fasten off, leaving tails at both ends. Wrap the cord in a loose spiral around the tree and tack it in place with a few small stitches.
Gold star (gold, make 2 layers)
- R1: 5 sc in a magic ring (5)
- R2: Work one point in each stitch: ch 3, sl st in the first chain, then sl st in the next ring stitch. ×5
- Fasten off each layer, leaving a sewing tail. Stack the two stars with points offset and sew them together; sew the finished star to the top of the tree.
- Sew the flat green base to the tree body's free front loops, adding a little stuffing before the seam is closed.
- Sew the brown trunk to the center underside of the base.
- Sew the six round ornaments around the tree, spacing the red, white and gold pieces evenly.
- Wrap the white chain cord in a loose spiral around the tree and tack it in place.
- Layer the two gold stars with their points offset and sew the star to the top of the tree.
- Check that the tree sits securely on its flat base, then weave in all yarn ends.
Make a Snowy white Pine Version
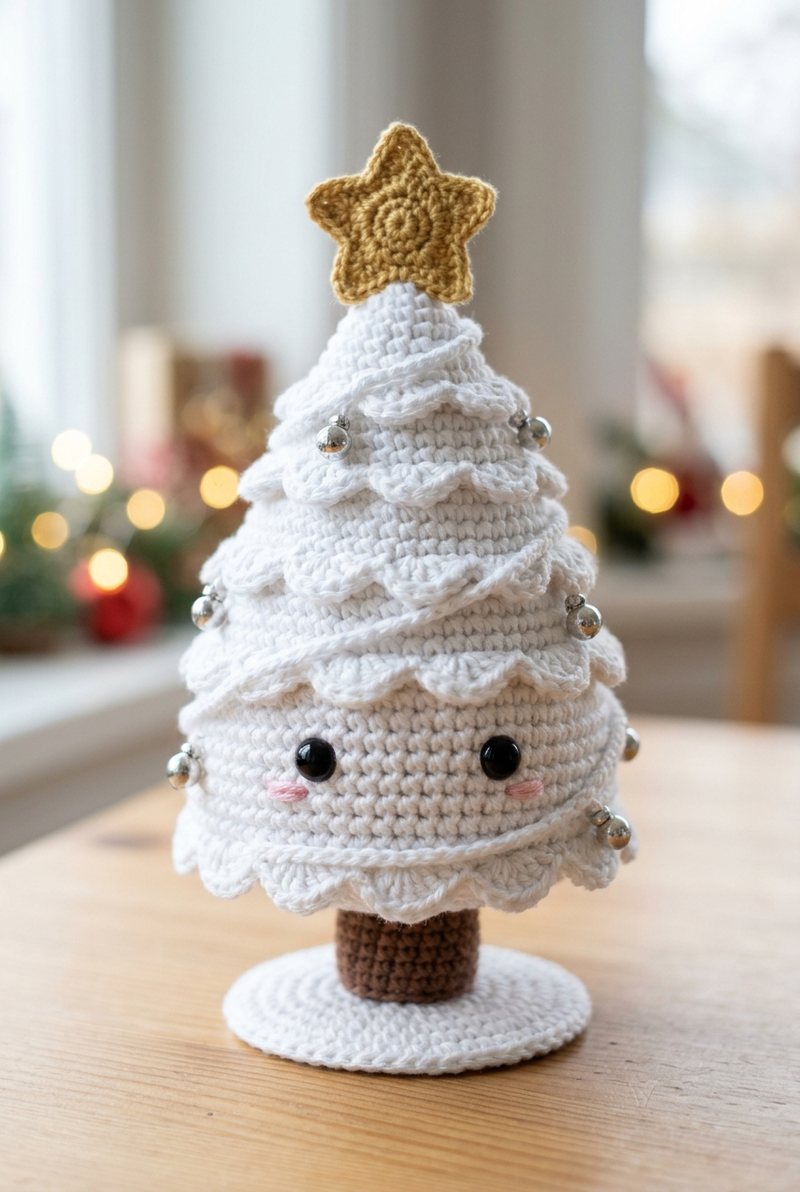
Work the tree body and base in white cotton, use silver for all six ornaments, and keep the brown trunk, white garland and gold star.
FAQ
Can I embroider the eyes instead?
Yes. Embroider the eyes with black yarn before stuffing the tree, especially if it will be handled by a young child.
Can I change the ornament colours?
Yes. Use any three colours you like, or make all six ornaments in one colour for a simple look.
How do I keep the star points neat?
Make each chain-picot point gently and keep the slip stitches snug but not tight. Offset the two layers before sewing them together.
More Free Patterns You Will Love
Love these patterns? Get new ones in your Pinterest feed.
Follow us on Pinterest